Sunday, September 5, 2010

My Creative Scrapbook - September

Well, hurricane Earl has made his way through the maritimes and with very little damage (at least on PEI). I am forever indebted to this hurricane for taking away the hot air mass and humidity which was stuck over us for almost a week. So today, the sun is shining, the temperature is normal and we are off to enjoy the unofficial last weekend of Summer. Cavendish here we come!

I leave you with another gorgeous (and huge!) kit from My Creative Scrapbook. These kits are always a pleasure to work with and they never disappoint! Check out what my fellow DT members have created as well. I am sure you will find tons of inspiration from their work.


Adorable in every way


This is a photo from a beach trip this spring (yes, the warm weather was here early this year!) I have journaling underneath the bottom lace strip but I had to crop it off out of the photo because my layout was looking a little crocked the way I photographed it.


Note the glittered doily in this close up. I have a tutorial further down in this post showing you how to do this.

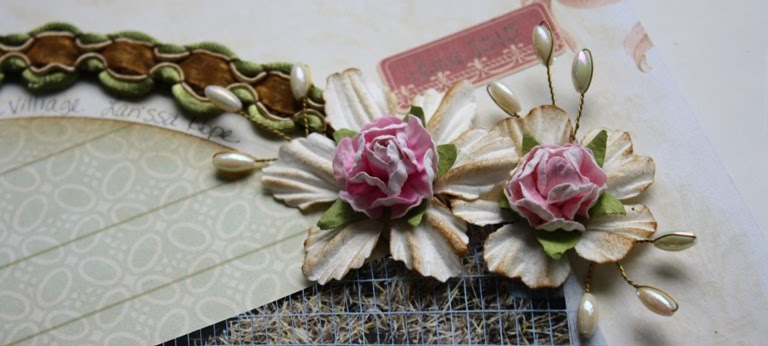
I actually stitched on that brown ribbon which something I never do! I would normally use my hot glue gun to make ribbon puckers but the hot glue would have gone right through this sheer ribbon. I placed pearls over the stitches to cover them up.

Rissy's Room


I made this little sign for Larissa to hang in her bedroom.

Heart Leaf

Larissa came in the house a few weeks ago and was very excited to show off this heart shaped leaf that she found outside (on her abenture as she would say...heehee) . She gave it to me and said it meant love :) Ever since that day, she always has a little glass sitting on the kitchen table that is filled with her heart shaped love leaves.

Fly

Fly: This is my little bird showing off her newest tricks on the trampoline :)


Here is a little tutorial on how to create these glitter/inked doilies.

Step 1) Assemble the products you will need. Glitter, ink, spray adhesive, scrap paper and of course a doily! A heat gun is optional but speeds up the process a little bit.


Step 2) Carefully ink the doily. I used pale colours to give it a soft effect. Just dab the doily carefully. Son't sweep the ink pad across the doily because it is delicate and tears easily.

Step 3) After inking the doily to your liking, place the doily on scrap paper. Use a large bag or box so that when you use the adhesive, it doesn't get on your work surface. Spray adhesive evenly over the doily. You will probably want to have a window open during this process because the spray adhesive smells quite strongly.

Step 4) Remove the doily off the scrap paper that was used for spraying the adhesive. Place doily on a clean piece of scrap paper and generously pour glitter over it. Shake off excess glitter and return it to the jar.

Your doily should look like this now but there will be one more step to seal in the glitter.

Step 5) Return the doily to the scrap paper you use spraying on adhesive. Spray another even coat of adhesive on the glittered doily to 'seal in the glitter. Carefully use the heat gun to finish drying the top coat of adhesive. Be very careful not to scorch the doily. (If you don't have a heat gun then you can leave the doily to air dry. It just take a little bit longer that way.)

Photobucket

Saturday, September 4, 2010

Her Party

Oooooh... a double layout! Now that's something you don't see too often coming from me. There was a time, about 6 years ago, when all my scrapping was double layouts because I was told that's what I was supposed to do. I'm not one to follow scrapbooking rules so I tossed that idea years ago. Not that there's anything wrong with doubles, it's just I find them quite difficult to do...plus it takes up double my working space! I normally start with a nice clean table but by the time I am done of a layout, I am working with a tiny 12x12 space on my desk.

These are all snapshots from Larissa's 5th birthday last January. There's all kinds of fun here 1) sparkle shoes 2) lots of cousins to share the day with 3) a new Hannah Montanna costume 4) My Little Pony pinata 5) blowing out 5 candles 6) Barbie jewerly box and 7) a very large My Little Pony cake with 5 ponies on it and 8) no party is complete without a game of pin the tale of the unicorn :)

I used bits and piece from Little Yellow Bicycle's Free Spirit line. I was lucky enough to win athis line on National Scrapbook Day. The rest of the goodies on this page are little bits from my stash, American Crafts Thickers, K&Co felt flower and Bella Blvd. papers.

For the misting, I used a sheet of KI Memories lace cardstock as a mask along with a pale pink mist that is a bit of a custom colour. I had Glimmer Mist that was too light and Maya Mist that was too strong so I mixed a bit of both to come up wit this colour.


Photobucket

Friday, September 3, 2010

Sweetness

Here are a few recent pages that I created for the Pink Paislee blog.


Sweetie: Oh my Larissa is a sweetie all right...with a major sweet tooth! She definately gets that attribute from her Daddy and she will do just about anything to get a treat. That's why she loves visiting her grandparents so much...she knows that a few cuddles and hints will usually land her a lollilop or a candy. This photo was taken at my parents place where she was happily leaning against their fridge and enjoying her sweet treat.

Most of the products here are from Pink Paislee's brand new Sweetness line (I LOOOOVE it!). The die cut though, is a halloween die cut paper (Spider's Lair) from their Hocus Pocus line. I used a craft knife to cut out the centre of of the die cut (the web portion). Then I took some pink markers and added a wee bit of colour of colour so it would tie in nicely with the Sweetness goodies. To create the lollipop, I simpy used a Sweetness Doodad with a lollipop stick glued underneath. You can get lollipop sticks at any candy supply store (I bought mine at the Bulk Barn).


This layout was based a sketch from the August PageMaps. I created it for Sketch Sundays at the Pink Paislee blog. It is another layout showing evidence of Larissa's sweet tooth. Her she is on Canada Day enjoying some cotton candy with her buddies.


Photobucket

Thursday, September 2, 2010

belated updates!

I am here and still alive! It has been a very busy summer and time has flown by a very fast. The first thing gets dropped when I am busy is my online life so forums, blogs, galleries etc all get a little bit (or a lot) behind. I had several blog posts that were scheduled to go up all during August but if I had have put the correct YEAR on the scheduler then it would have probably worked better. LOL

So, I have oodles and oodles of work to share that I have created throughout the summer. First, these are the layouts that I created with a kit from Let's Capture Our Memories. A little birdie told me that there are a few kits left up for grabs so if you want to you can still get one here.

It's a beautiful day: This was my first time working with Webster's beautiful bloom trims *swoon* I love these! I would happily use them on every single page if I could. I snapped this photo of Larissa while on an evening walk. It looks like a beautiful evening for a walk but unfortuntely it was cut short because of the black flies and mosquitoes that were feasting on us :(


Little Chicks: We were visiting a local attraction and they had these baby chicks. Larissa was just fascinated with them. She spoke to them in a very high tone was trying to get them to come closer to the cage so she could get a better look.

The gate was cut out from one of the pattern papers in the Webster's kit. A wee bit tedious but so worth the effort. I also cut the birdie & tea cup from another paper in the kit.


Roadside View: This is another photo that I snapped while on our bug-infested evening walk. It was in June when all the island ditches are filled with beautiful lupins.


Thanks for stopping by today.

Photobucket

Tuesday, July 13, 2010

Tiny Freckles

Hey everyone! It's been a while since I've blogged. I have tons of work to share so I have lots of posts scheduled for the next several days.

Today I want to show you a layout that I did some time ago but forgot to post. I just had to do a layout about Larissa sweet little freckles around her nose.

I used a few small pieces from Kaisercraft's Devonshire collection which inspired this colour pallette of soft oranges, blues and greens. I only had one sheet of this paper so I cut it up and used small pieces of it around the layout.

The colour inspiration ------->>>>>
The how to ------->>>>>
To create the mask for the background, I used pieces of a piece of Marth Stewart lace cardstock. I cut the lace cardstock up and taped it to a circle to create this mask. It's not pretty but it does the trick! For the mist, I used a combination of orange Maya Mist and gold Tattered Angels Glimmer Mist. I mixed them together in a separate bottle to get this soft orange colour. It worked out just great because one colour was too strong the the other too light but together they were the perfect mix.

I decorated the inside of my circle with layers and layers of cream lace. The masked flowers are bordered by gathered tulle and pearls.

Thanks for stopping by today!

Photobucket

Thursday, July 1, 2010

Celebrating Canada

HAPPY CANADA DAY!!

I'm off celebrating Canada Day with my family but I wanted to schedule a post to show you this Celebrating Canada layout that I created using Pink Pailsee's 365 Degrees line. You can find this layout published in Canadian Scrapbooker's summer 2010 volume.

To create the masked title, I used Pink Paislee chipboard alphas. I patted the sticky back of the alphas against a cloth so they wouldn't be quite so sticky. I stuck them gently down on my paper and then sprayed red Maya Mist. I then removed the letters which gave me this neat effect for the title.


Right about now I'm heading down east to watch a small town parade in Cardigan, PEI. Then the rest of the day is filled with BBQs, pony rides, small town festivities and will be wrapped fireworks after the sun goes down. Of course, we will all be sporting our red & white clothes, maple leaf tattoos and flags and there will lots of photos!

Happy Canada Everyone!!!!

Photobucket